| MATLAB Function Reference | Search Help Desk |
| frameedit | Examples |
frameedit
frameedit filename
frameedit
frameedit
opens the PrintFrame Editor window with a new file.
frameedit filename
opens the PrintFrame Editor window with the specified filename, where filename is a .fig file you previously created and saved using frameedit.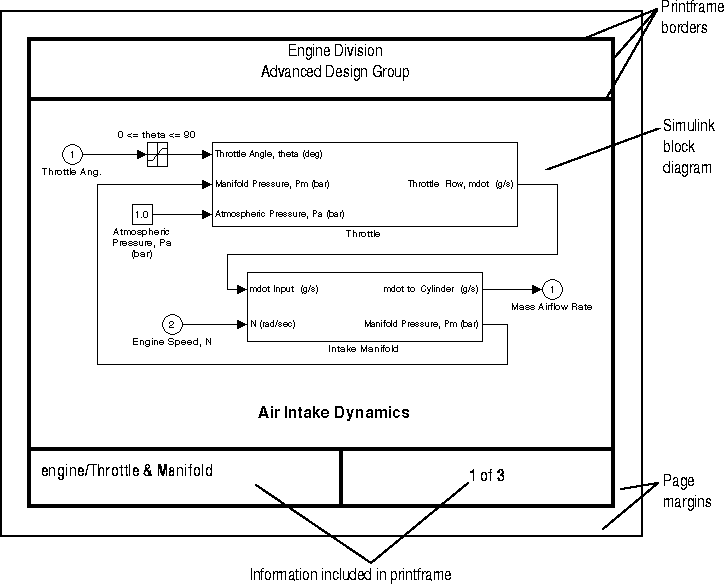
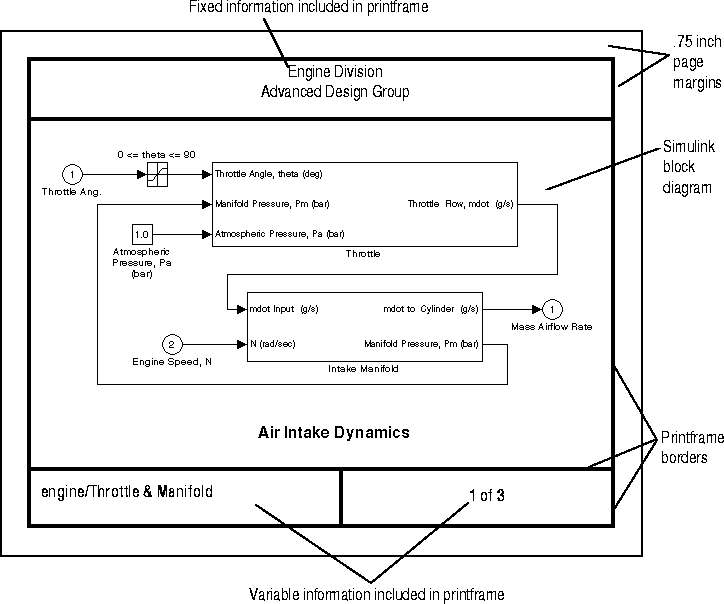
frameedit at the MATLAB prompt. The PrintFrame Editor window appears. Below is an illustration of the PrintFrame Editor window including the default printframe that the window opens with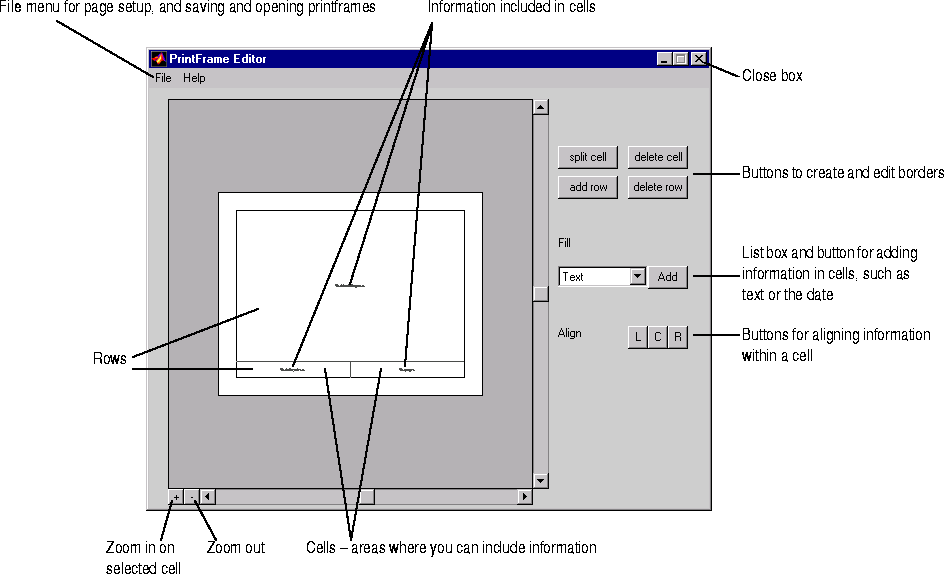
.fig file.
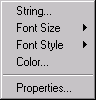
Text command String property for a list of allowable sequences.
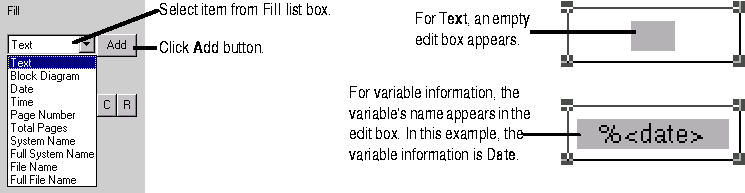
All of the items in the Fill list box, except for the Text item, are for adding variable information, which is supplied at the time of printing. When you print a Simulink block diagram with a printframe that contains variable information, the information for that particular Simulink block diagram prints in those fields.
The variable entries you can include are:
dd-mmm-yyyy format, for example, 05-Dec.-1997.
hh:mm format, for example, 14:22.
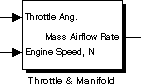
engine/Throttle & Manifold.
engine.mdl.
\\matlab\toolbox\simulink\simdemos\engine.mdl.
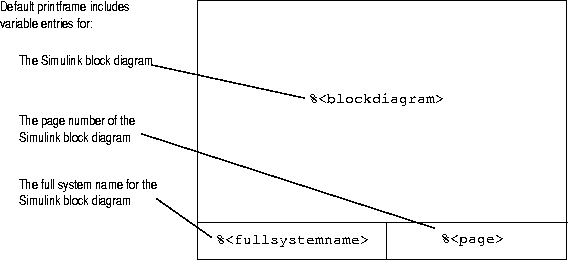
%, is automatically included to identify the entry as variable information rather than a text string, and the type of entry, for example, page, appears in angle brackets, < >. The entry consists of the entire string, for example, %<page>, for Page Number.
You can include multiple entries in one cell. Select the cell and then add another item from the list box. The new entry is added after the last entry in that cell. You can also type descriptive text to any of the variable entries without using the Text item in the Fill list box - type text in the edit box before or after an entry and the text prints with the block diagram.
Note:
%<blockdiagram> must be the only information in that cell. If there is any other information in that cell, you cannot save the printframe and therefore cannot print it with a Simulink block diagram.
Zooming
While using the printframe editor, you might need to zoom in on an area to better see the information you added. Click in the cell you want to zoom in on and then click the zoom in button. The area is magnified. Click the zoom in button repeatedly to continue zooming in.
%<blockdiagram> entry - the Simulink block diagram is automatically scaled and centered to fit in that cell at the time of printing.
Editing Text Strings
You can change text you typed in a cell:
%
from the %<page> entry, the text <page> will print instead of the actual page
number.
%<page>.
%<blockdiagram> entry
is not relevant and does nothing.
.fig file. A .fig file is a binary file used for printframes.
You can open a saved printframe in the printframe editor, make changes to it, and save it under the same or a different name. To open an existing printframe, select Open from the File menu and then select the printframe you want to open. All printframes are .fig files. Alternatively, you can open a printframe from the MATLAB prompt: type frameedit <filename> and the printframe editor opens with the printframe file you specified.
Closing the Printframe Editor
To close the PrintFrame Editor window, click the close box in the upper right corner, or select Close from the File menu.
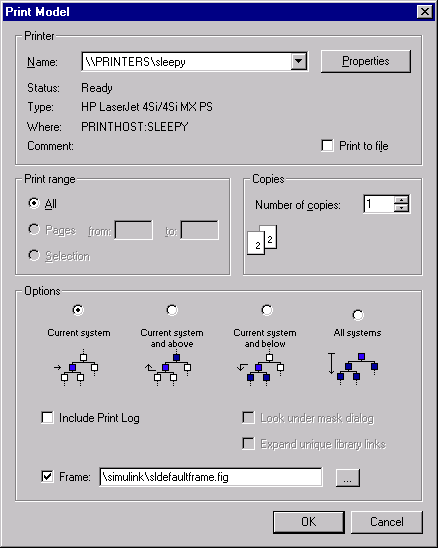
Printing Simulink Block Diagrams with Printframes
When using Simulink, you can print a block diagram with the printframe. Select Print from the Simulink File menu.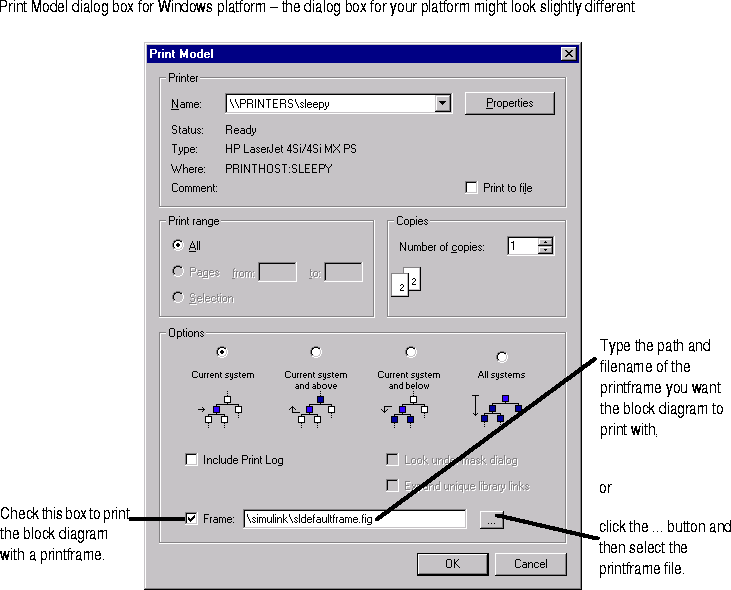
sldefaultframe.fig, appears in
the filename edit box until you specify a different filename.
frameedit.
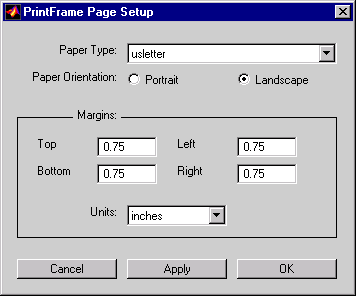
.75 inches.
The dialog box closes. If you changed the Paper Type, the printframe you see in the PrintFrame Editor window will reflect your change.
%<blockdiagram>
entry).
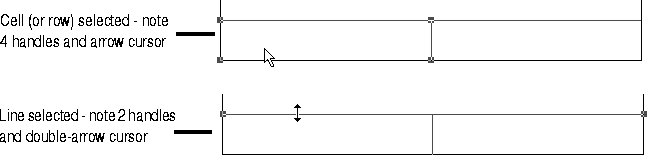
Be sure that only two handles appear, one at each end of the line. If you see four handles in either row, click directly on the horizontal line and the other two handles disappear.
If the pop-up menu for font properties does not appear, you are in editing mode. Click outside of the edit box to end editing mode and then right-click on the text to access the pop-up menu.
The %<npages> entry appears after the %<page> entry. If you need to, zoom in to see the entry.
of after the page number entry: click the cursor after the
%<page> entry, and then type of (type a space before and after the word).
%<page> of %<npages>.
engdivl for the File name. Click the Save button.
.fig file.
engine at the MATLAB prompt.
engdivl printframe, but note that their variable information in the
printframe is different.